Learn how to create a session note, apply a template or start from a previous note, associate a file and add your signature
Once a session is completed, you'll need to add a note to the session to keep track of your history with that client.
In this guide, you will learn:
- Opening a Session Note
- Using the Note Editor
- Importing a previous note into the current note
- Applying a note template from your Practice Templates
- Associating documents to a session note
- Signing the note to finalize it
Opening a Session Note
To give you the most flexible workflow, there are three different places in Owl where you can write your session notes:
- The Calendar
- The Client Account
- The Workflow
To open and work on a session note from the Calendar:
- From the Calendar click on the scheduled session.
- This opens a Session Overview window.
- Click on Create Note.
- Write the note directly into the Note Editor window that pops up. You can format it using any of the options in the top bar.
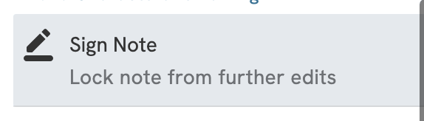
- When you are done your note click Sign to add your therapist signature in.
- Press Save or Save and Close to save your work!
To open a session note from the Client Account:
- Head to the Client Account.
- Open the Sessions tab.
- This will display a full list of sessions the client has been scheduled for.
- Click on the blue Create Note button next to the session for which you are writing the note, this button will be on the far right of your screen.
- When you are done your note click Sign to add your therapist signature in.
- Press Save or Save & Close to save your work!
To open a session note from the Workflow:
- Head to the Workflow.
- In the left management bar, click Notes.
- Here, you will see a list of every note up until today that has not yet been signed .
- Click on the blue Create Note button next to the session for which you are writing the note.
- When you are done your note click Sign to add your therapist signature in.
- Press Save or Save & Close to save your work.
- As soon as you sign a note, it will disappear from this list.
Using the Note Editor
When you open the Notes Editor, you'll see a blank word processor-style canvas so you can start typing a freehand note right away if you would like. There are multiple style and formatting options available to use in the toolbar. 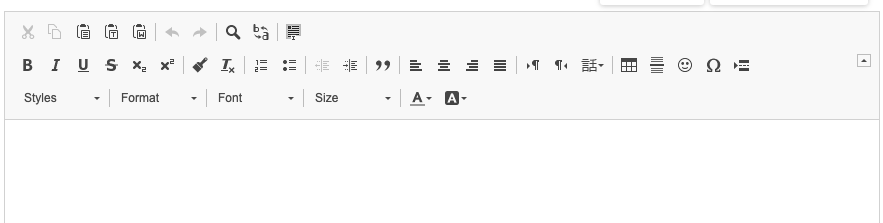
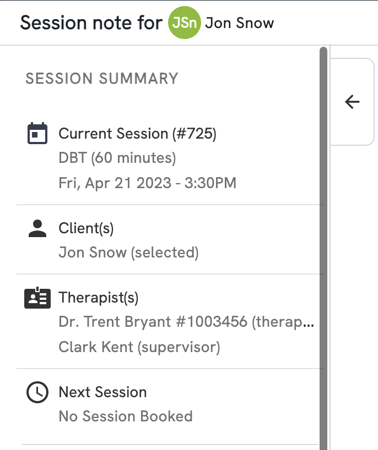
Along the left side you'll find the Session Summary, with details about the current session, service, client(s), therapist(s) and the client's next session if applicable. Use the arrow to collapse the sidebar for a more focused note-writing view
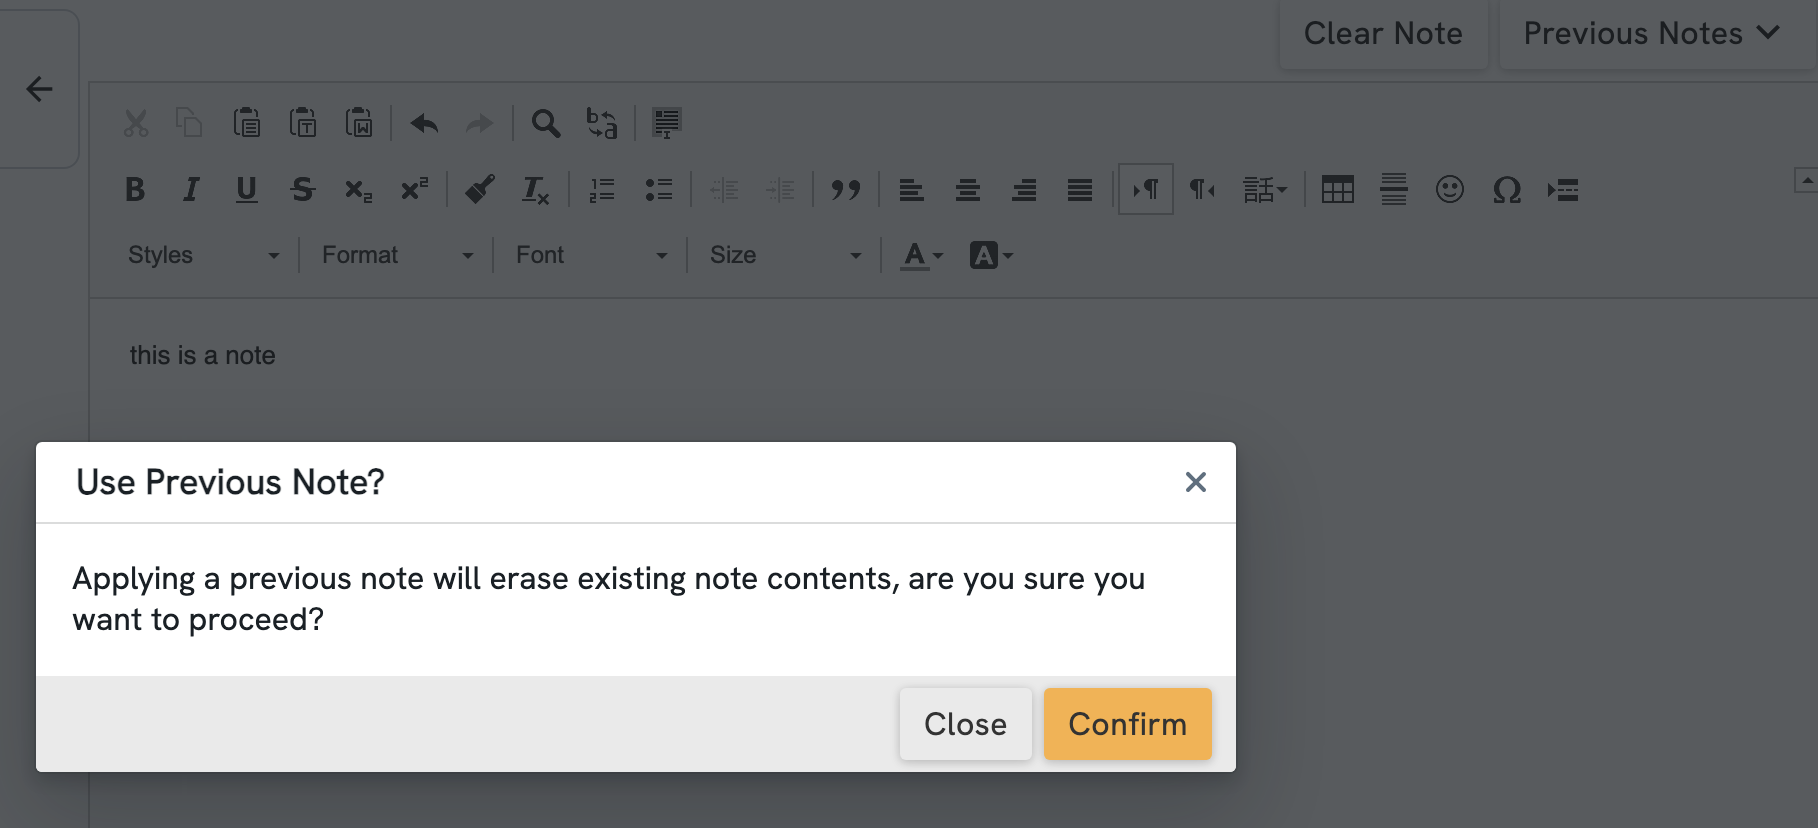
Importing a previous note into the current note
If you would prefer to use your previous note as a starting point, you'll find a dropdown menu in the top right corner that allows you to choose either the most recent note, or from a list of earlier sessions.
In the event of an error, use the "Clear Content" button to delete any content in the note template but maintain the formatting, or "Start Over" to erase the template and return to the blank text editor.
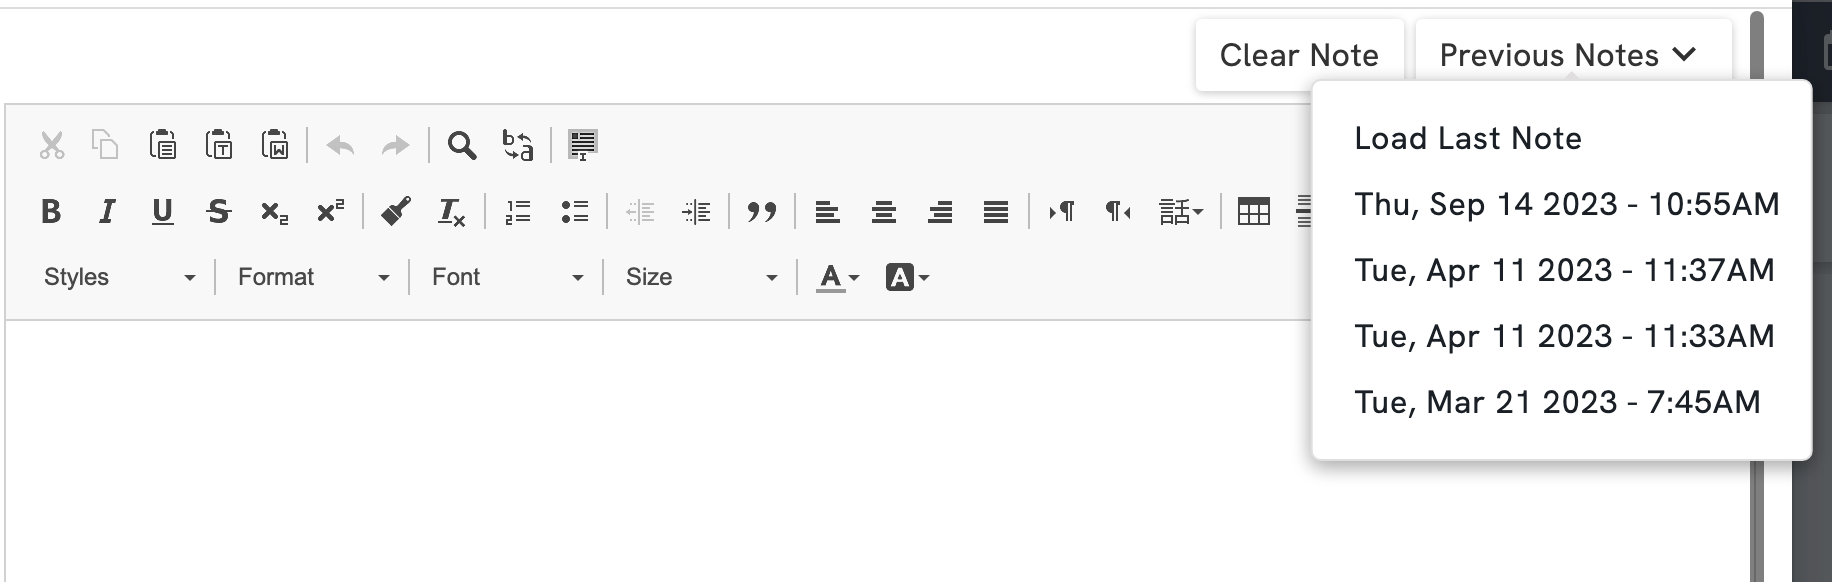
Important: Importing a previous note will clear any content you have written into the text box, so be sure to select the previous note as your first step.
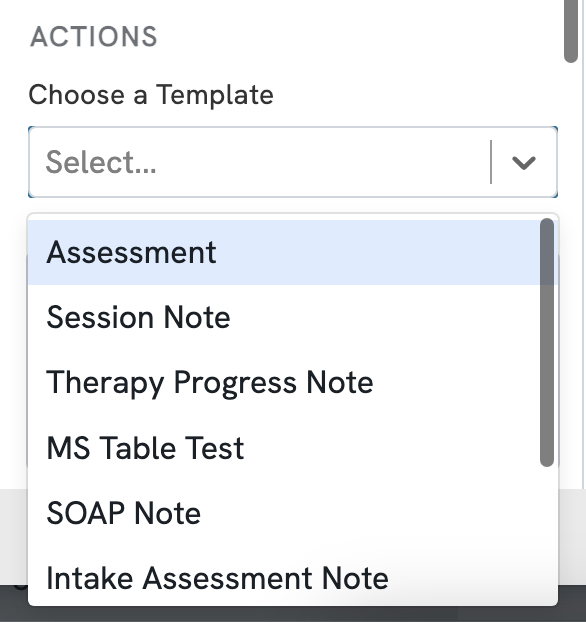
Applying a note template from your Practice Templates
Once your clinic has set up one or more templates under Manage > Notes > Practice Templates, you will be able to apply a template to your note from within the Actions section in the left sidebar.
For more details on how to configure your practice templates, refer to our Note Templates Overview article
When you add a template, you will have the option to append it to the start or end of what you have already written, or replace it entirely. 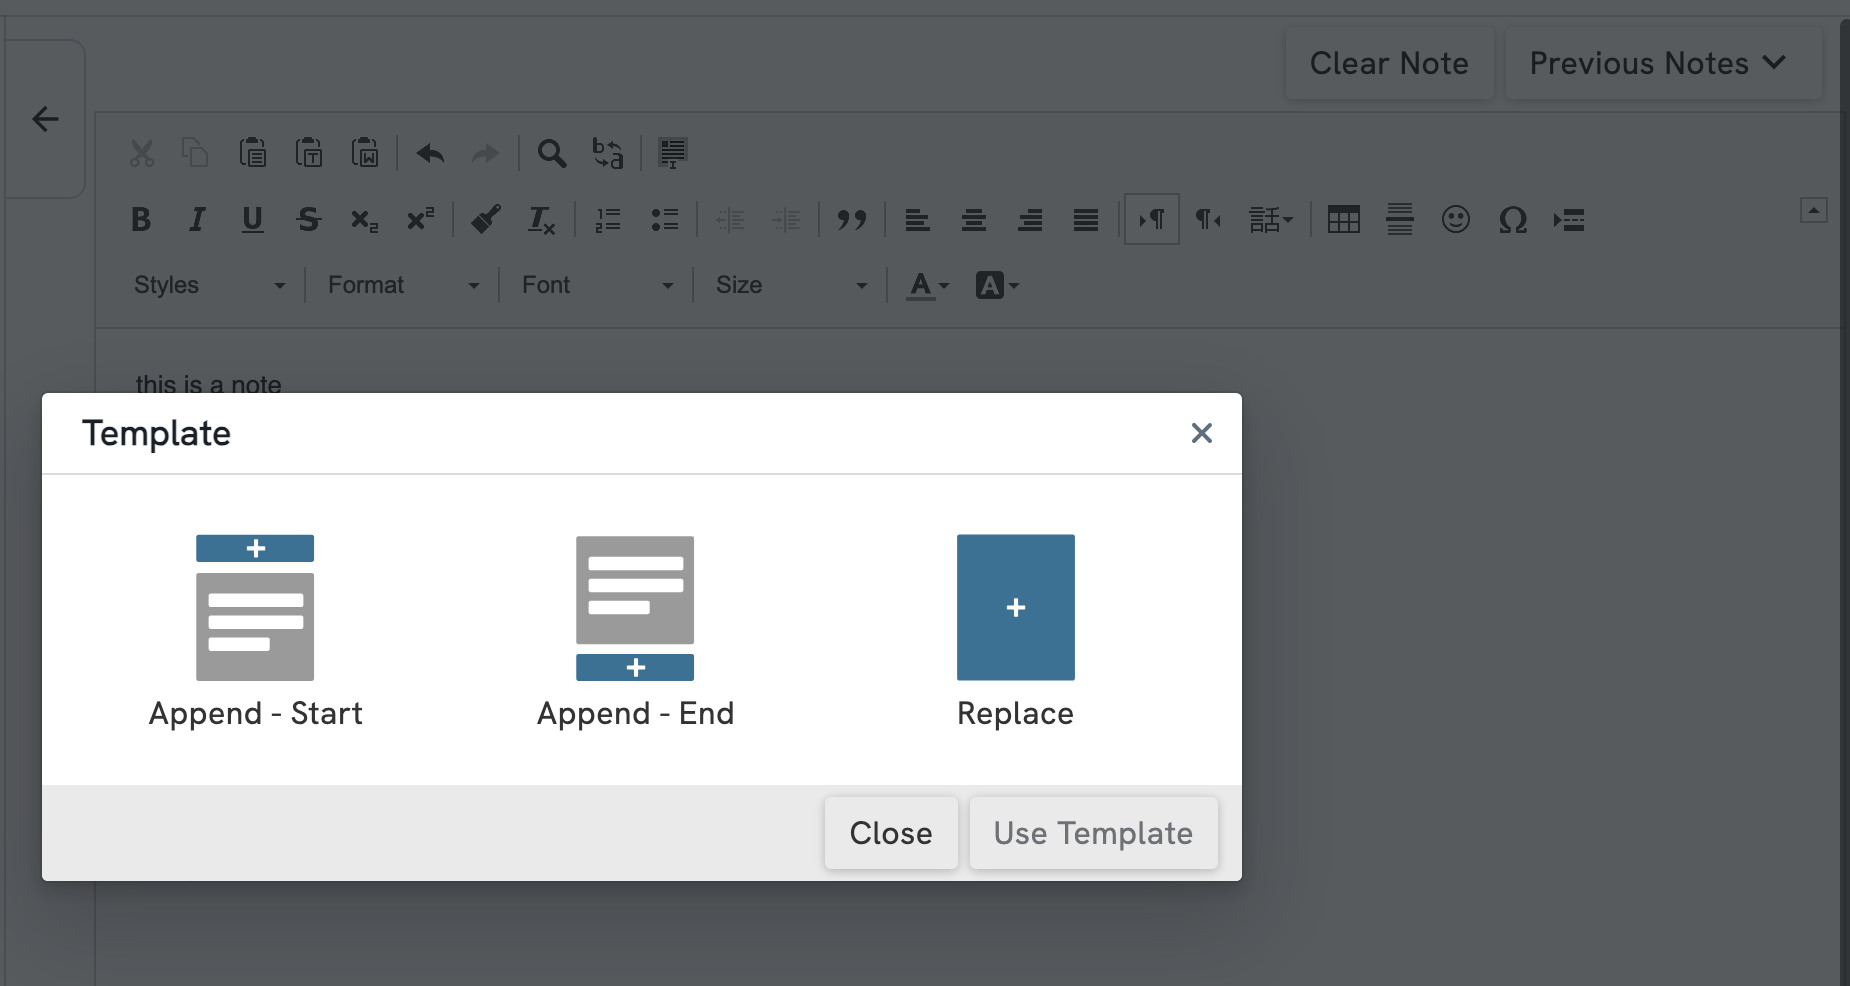
With Owl's new notes update, you now have the ability to apply multiple templates to a single note. Each time you choose a new template you'll be asked whether to append it at the start, end, or replace the existing content.
Associating documents to a session note
To upload documents to a Client's account, click here to learn how. Otherwise, if you have a document of any sort that must be associated to a specific session, head to the Note for that particular session. On the left-hand control panel, you will see an Associated Files section at the bottom.
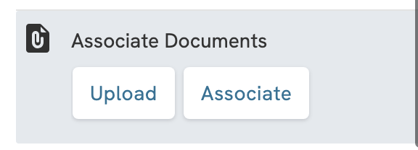
To upload a new file to the session, click Upload and find the file on your hard drive.
To associate an existing file to that session, you should first make sure that the file is uploaded to the client's account. If files exist, you'll be able to select it from the pull down menu.
Once associated, this file will be available from the note, and the note will be available next to the file in the Documents tab.
Signing the note to finalize it
Click here to learn how to upload your signature!