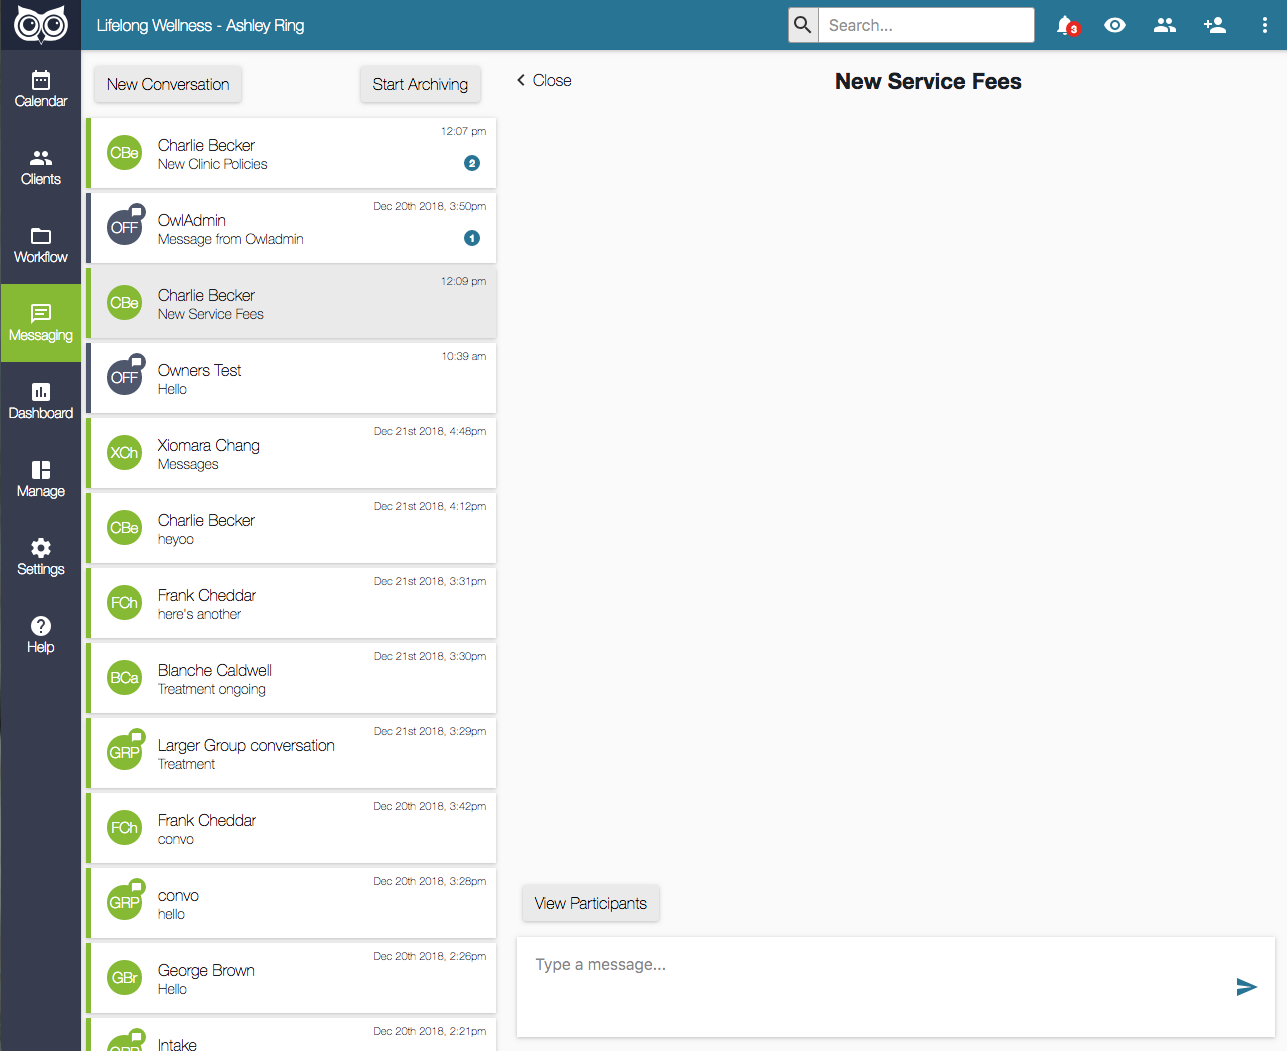
Access the Secure Messaging feature by clicking on the Messaging option in the sidebar. This is where all of your conversations are stored.
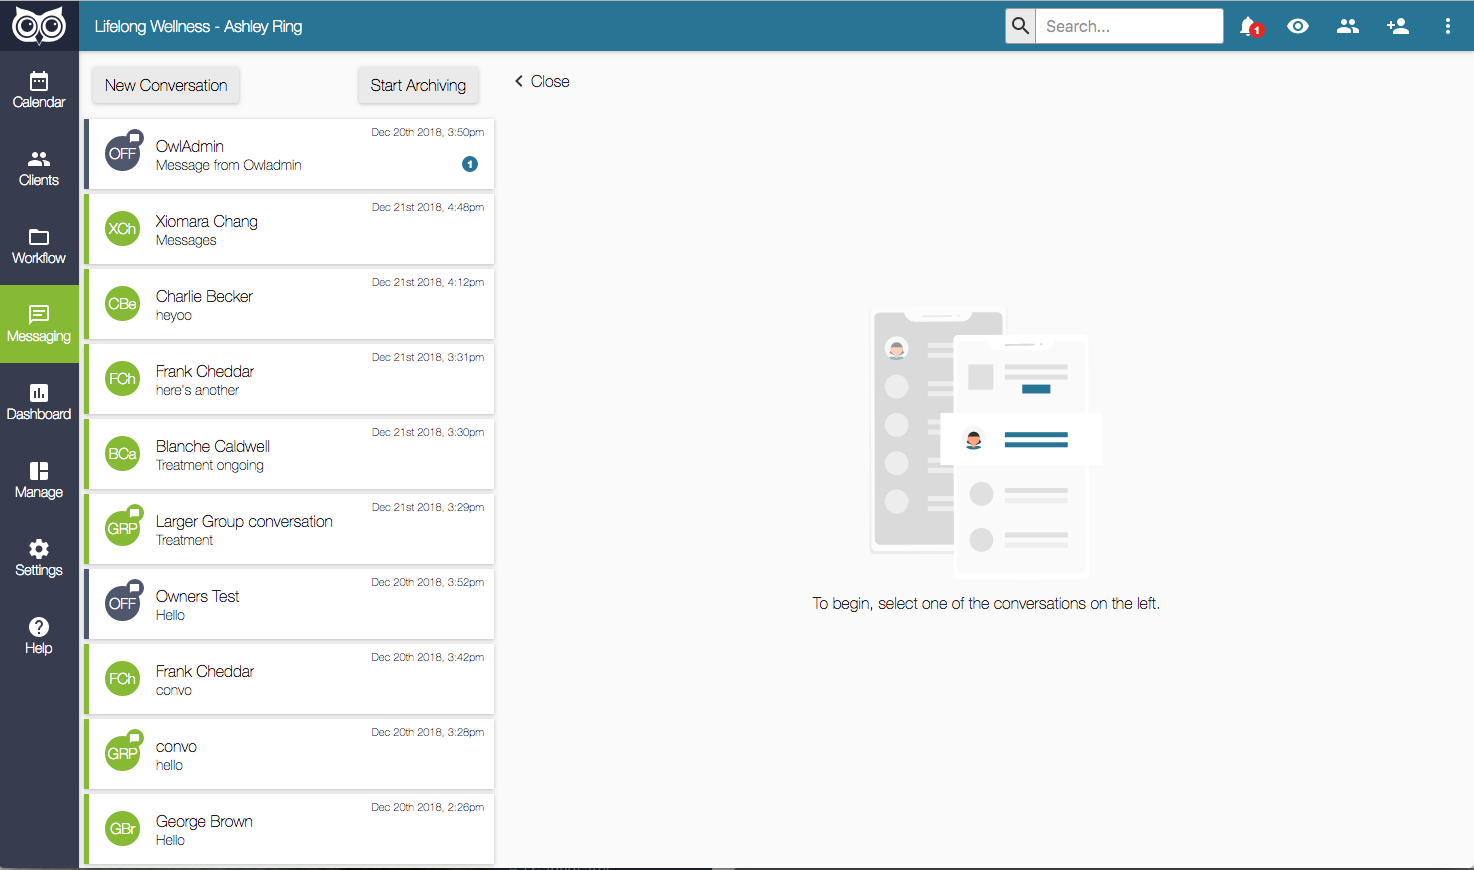
To start a conversation, click on the “New Conversation” button. If your practice has the Client Portal add-on you’ll have two different chat type options:
- Client - for conversations with clients of the practice
- Office - for conversations with other users at the practice
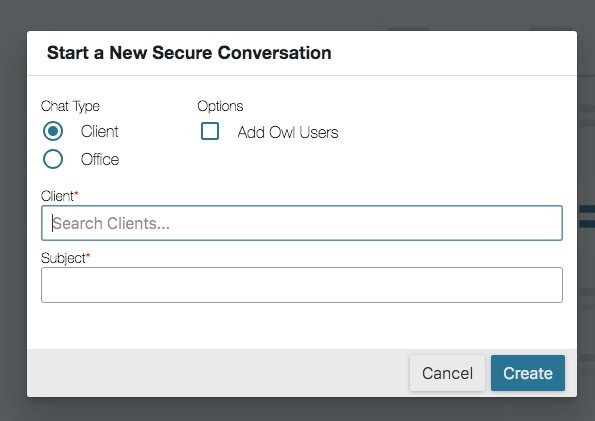
Client Conversation:
- When the radio button is set to “Client” you’ll be prompted to search for a client by name. Type the client’s name into the field provided and choose the matching result.
- If the name of the client you’ve selected appears in red, it means that they do not yet have a Client Portal account and cannot participate in Secure Messaging conversations. You’ll need to have the client create a Client Portal account first by going through your Owl Client Portal site. Or, you can create a portal account on their behalf by opening their client profile and going to Contact & Clinical > Account Details. If you have an email address on file for this client you can use that address and assign them a password.
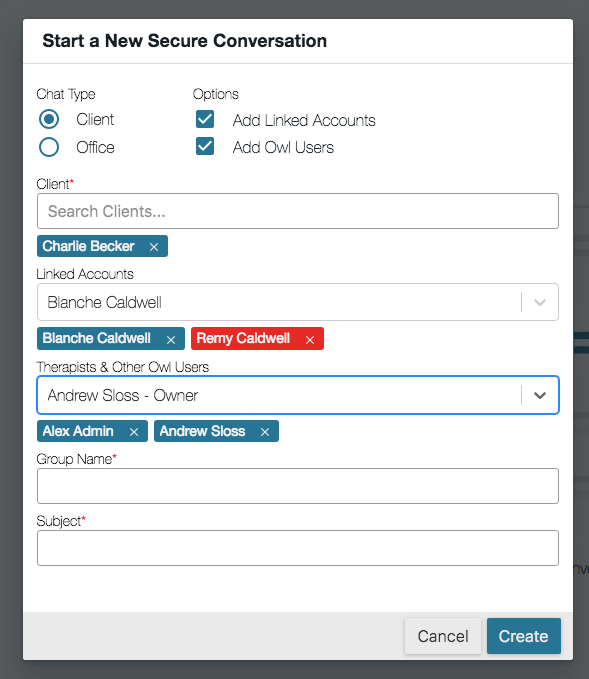
- If the name of the client you’ve selected displays in blue, it means that they have a client portal account and can participate in Secure Messaging conversations with the practice.
- If the name of the client you’ve selected appears in red, it means that they do not yet have a Client Portal account and cannot participate in Secure Messaging conversations. You’ll need to have the client create a Client Portal account first by going through your Owl Client Portal site. Or, you can create a portal account on their behalf by opening their client profile and going to Contact & Clinical > Account Details. If you have an email address on file for this client you can use that address and assign them a password.
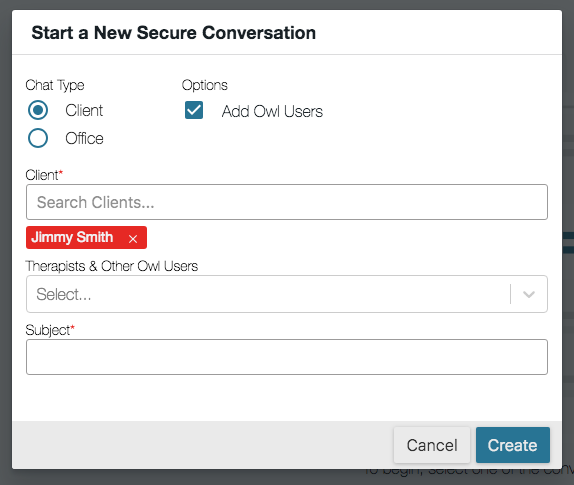

- Next to the Chat Type you’ll see a section called Options. You can flag either of these checkboxes to add other participants to the conversation.
- Add Linked Accounts - if the client you’ve selected has linked accounts in their Circle of Care, flagging this checkbox will add the Linked Accounts drop down menu to the window so you can add linked accounts to the conversation.
Please Note: The Linked Accounts also need to have a Client Portal account to participate in conversations. When you add a linked account, if their name turns blue it means they have a Client Portal account and can chat, but if their name turns red it means they do not yet have a Client Portal account. - Add Owl Users - flagging this checkbox will add the Therapists & Other Owl Users drop down menu to the window so you can add owners, other therapists, or even office admins to the conversation.
- Add Linked Accounts - if the client you’ve selected has linked accounts in their Circle of Care, flagging this checkbox will add the Linked Accounts drop down menu to the window so you can add linked accounts to the conversation.
- When you add more than one person to a conversation, you’ll be prompted to assign it a Group Name. The Group Name allows you to more easily identify the conversation from the listing in the sidebar.
- You’ll also be prompted to assign the conversation a Subject. Just like an email subject, it’s intended to be a brief word or two about the nature or purpose of the conversation
- Click the button to start the conversation
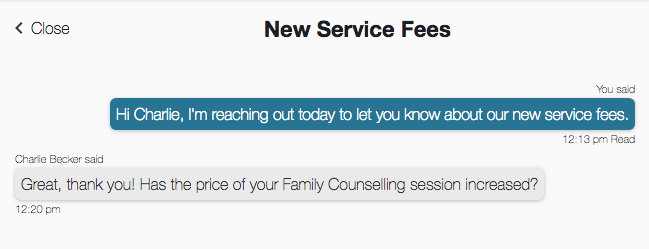
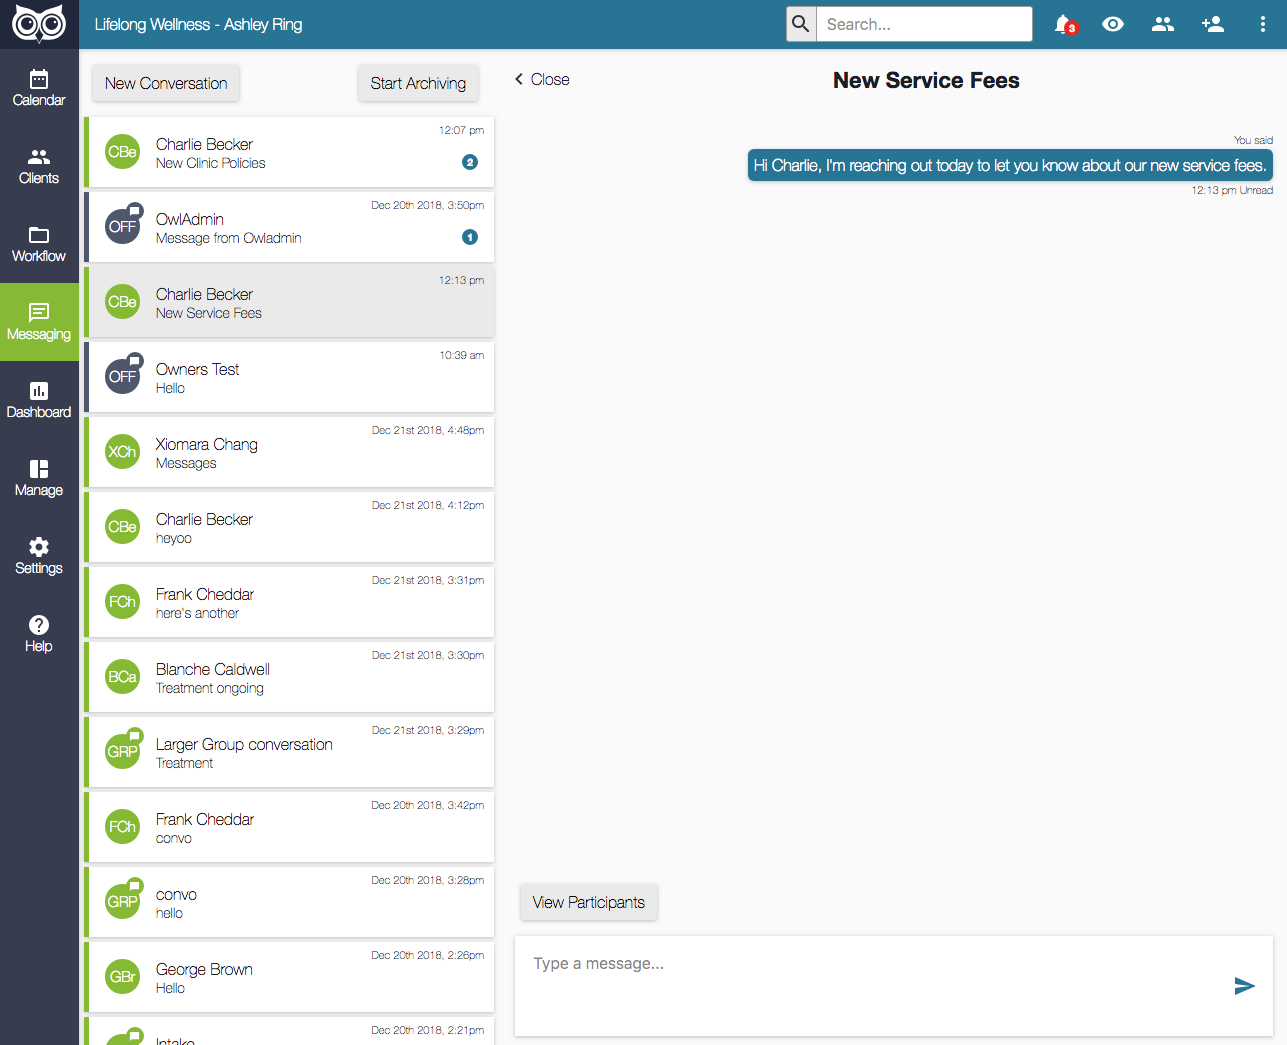
- Once the conversation has been created you’ll see the Subject at the top of the page in bold font and a text box that you can type into to send a message to the client
- Type your message into the field at the bottom of the window and then click the paper airplane icon or hit the enter key on your keyboard to send it
- You will see the message you’ve typed in the window
- Every message you send is date and time stamped within the conversation. You’ll see a status next to the timestamp as well, which will either say “Unread” or “Read”
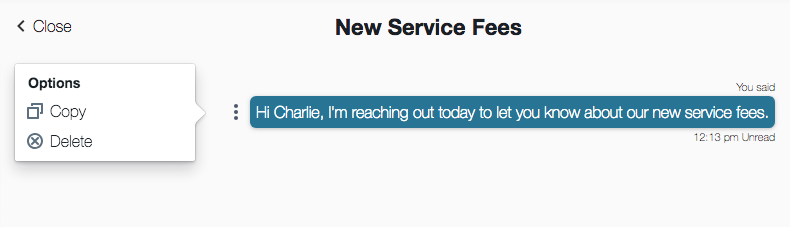
- If you hover over the message, you’ll see three vertical dots appear next to it. Hovering over this icon opens an Options menu:
- You can click the Copy option to copy all of the text in this line of message
- If the message status is “Unread”, you’ll have the option to delete it. Once the client has read the message, it can no longer be deleted
- When the client replies to your message, you’ll see their response in the conversation
- If you hover over the client’s response, you will see that same menu with the three vertical dots. Hovering over this icon opens an Options menu:
- You can click the Copy option to copy all of the text in this line of message
- You can click the Create To-Do option to log a To-Do on this client’s profile regarding the conversation. The Note for the To-Do is pre-populated with the line of text from the client’s response, but you can edit it if needed and then click the Add To Do button to save it
- When you’re viewing a client conversation, you can click the View Participants button to see everyone who is part of the conversation

Conversations between one client and one therapist will be clearly displayed as non-group chats. You can see the total number of Clients and Linked Accounts as well as Therapists & Owl Users in the conversation:


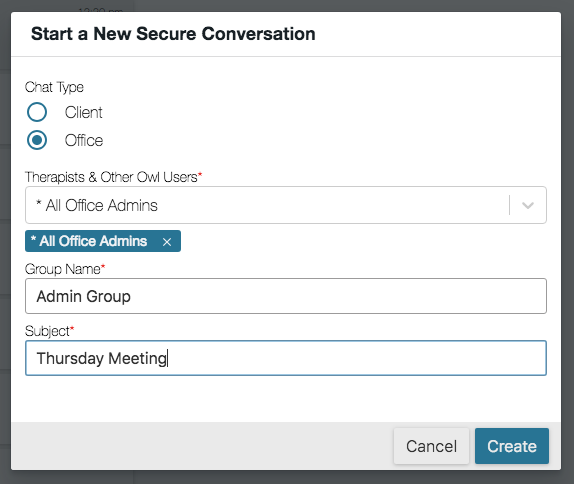
- To start a conversation with one of your colleagues at the practice, or someone else on staff go into Messages, click the New Conversation button, and choose the Chat Type “Office”
- You can type the name of the person into the Therapists & Other Owl Users field to find the person or you can click that field to scroll through all of the users listed and select the one you’d like to message
- You can choose multiple people from the list, as many as you need
- There are pre-populated a few options by user type like All Office Admins, All Owners, and All Therapists for quick setup of group messaging. We’ve also created an option called All Office that allows you to start a chat with every single user at the practice
- You will need to input a Group Name if there are multiple participants and input a Subject
- Click the Create button to start the conversation
- Start typing the message in the field provided to chat with your colleagues and other staff members
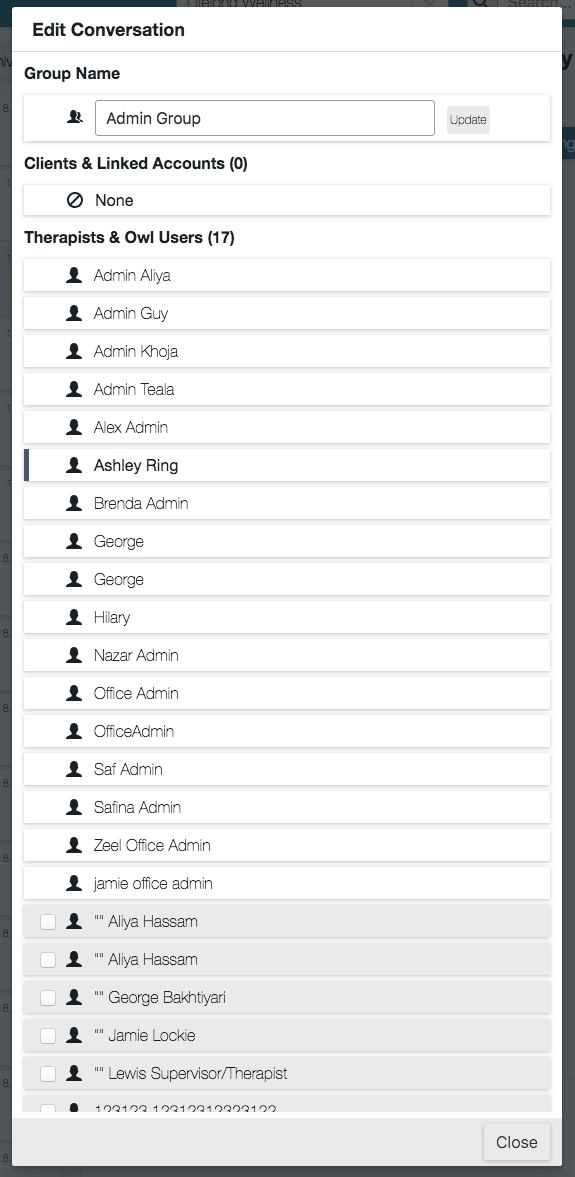
- When you’re viewing the conversation, you can click the Edit Conversation button to add additional participants if needed. All of the participants who are currently part of the conversation appear in the list with a white background. All of the users who are not yet part of the conversation appear in the list with a grey background and a checkbox next to their name. Participants can be added to any group conversations as needed.
- Flag the checkbox next to a user you would like to add and a prompt will appear letting you know that this person will be permanently added to the conversation. Once you have added a user to a conversation they cannot be removed. It is also important to know that when you add additional participants they will be able to see the entire chat history, including all of the messages that were sent prior to them joining the conversation.