Overview
Lists allow you to create custom lists of your clients, based on the Tags associated with those clients. You now have the ability to define your own relevant tags, assign them to client profiles, and sort or filter the data however you need! Lists can provide greater granularity to pull information based on specific categories or details.
There are two things you need to have set up before you can use this feature:
- Create at least one Client Tag (Settings > Practice Details > Tags)
- Assign a Tag to at least one Client (Client > Add Tag Icon in top panel)
You can review our Tags feature in more detail here. Once at least one tag is assigned to at least one client, you can start composing Lists. The more tags you have assigned to more clients, the more complex and varied your lists can be.
Create a List
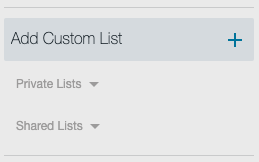
There is a new section within the Clients tab sidebar called Custom Lists, where you can create your own custom Client Lists. Click the Add Custom List option in the sidebar, and you will be prompted to begin creating the list.
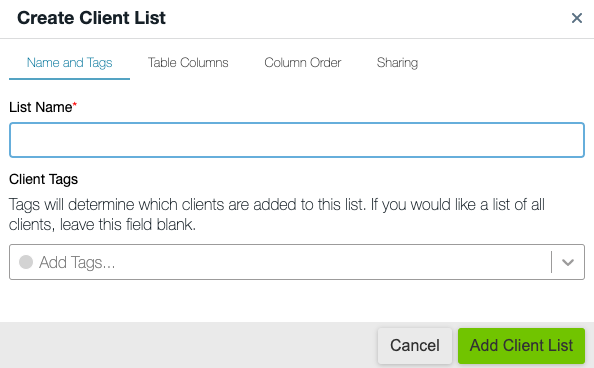
First, give your new list a name. Next, select any number of available Tags, and only the clients for which any of the selected Tags apply will be added to the list. Optionally, you can leave the Client Tags blank, creating a list of all clients.
In the Table Columns tab, you can choose all of the sections you would like to use for the layout of the list.
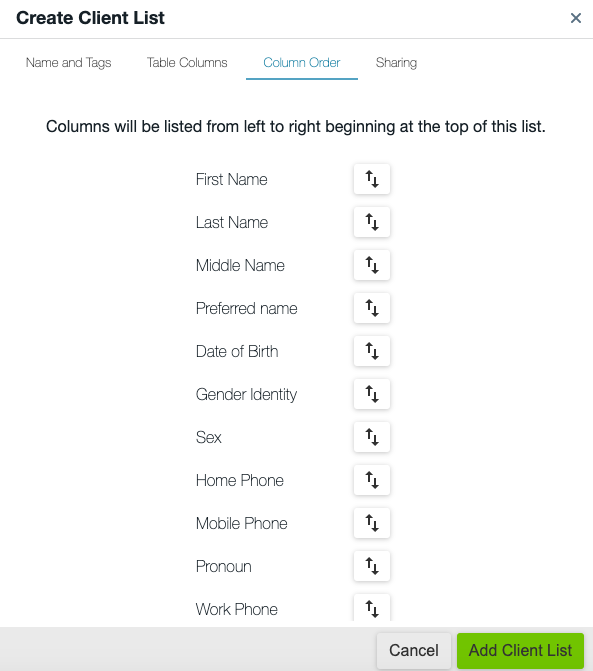
In the Column Order tab, you can rearrange the order that these columns will appear in.
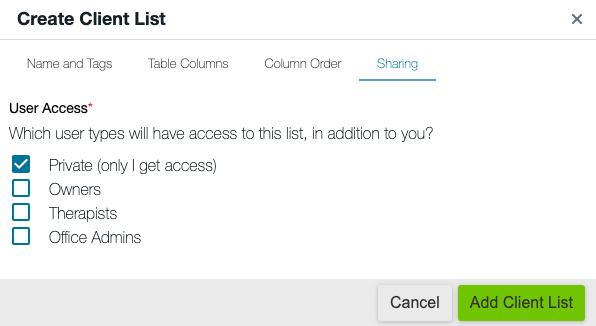
Finally, in the Sharing tab, you can determine which users on the account (besides yourself) will be able to access the list you create.
Click the Add Client List button, and your new list will be saved!
View Lists
Once the List has been saved, you can find it in the Custom Lists sidebar and click on its name to display it. Here, you will see all of the Clients that are part of that List. All of the column headers you had selected are displayed; if there are too many to be viewed on one page, the page will be scrollable from left to right to see more.
Export Lists
Each list you create is exportable to .csv file type. Clicking the Download icon in the top right-hand corner of the page will download a .csv file of the list data. This file can then be opened in any spreadsheet program, such as Excel or Numbers.